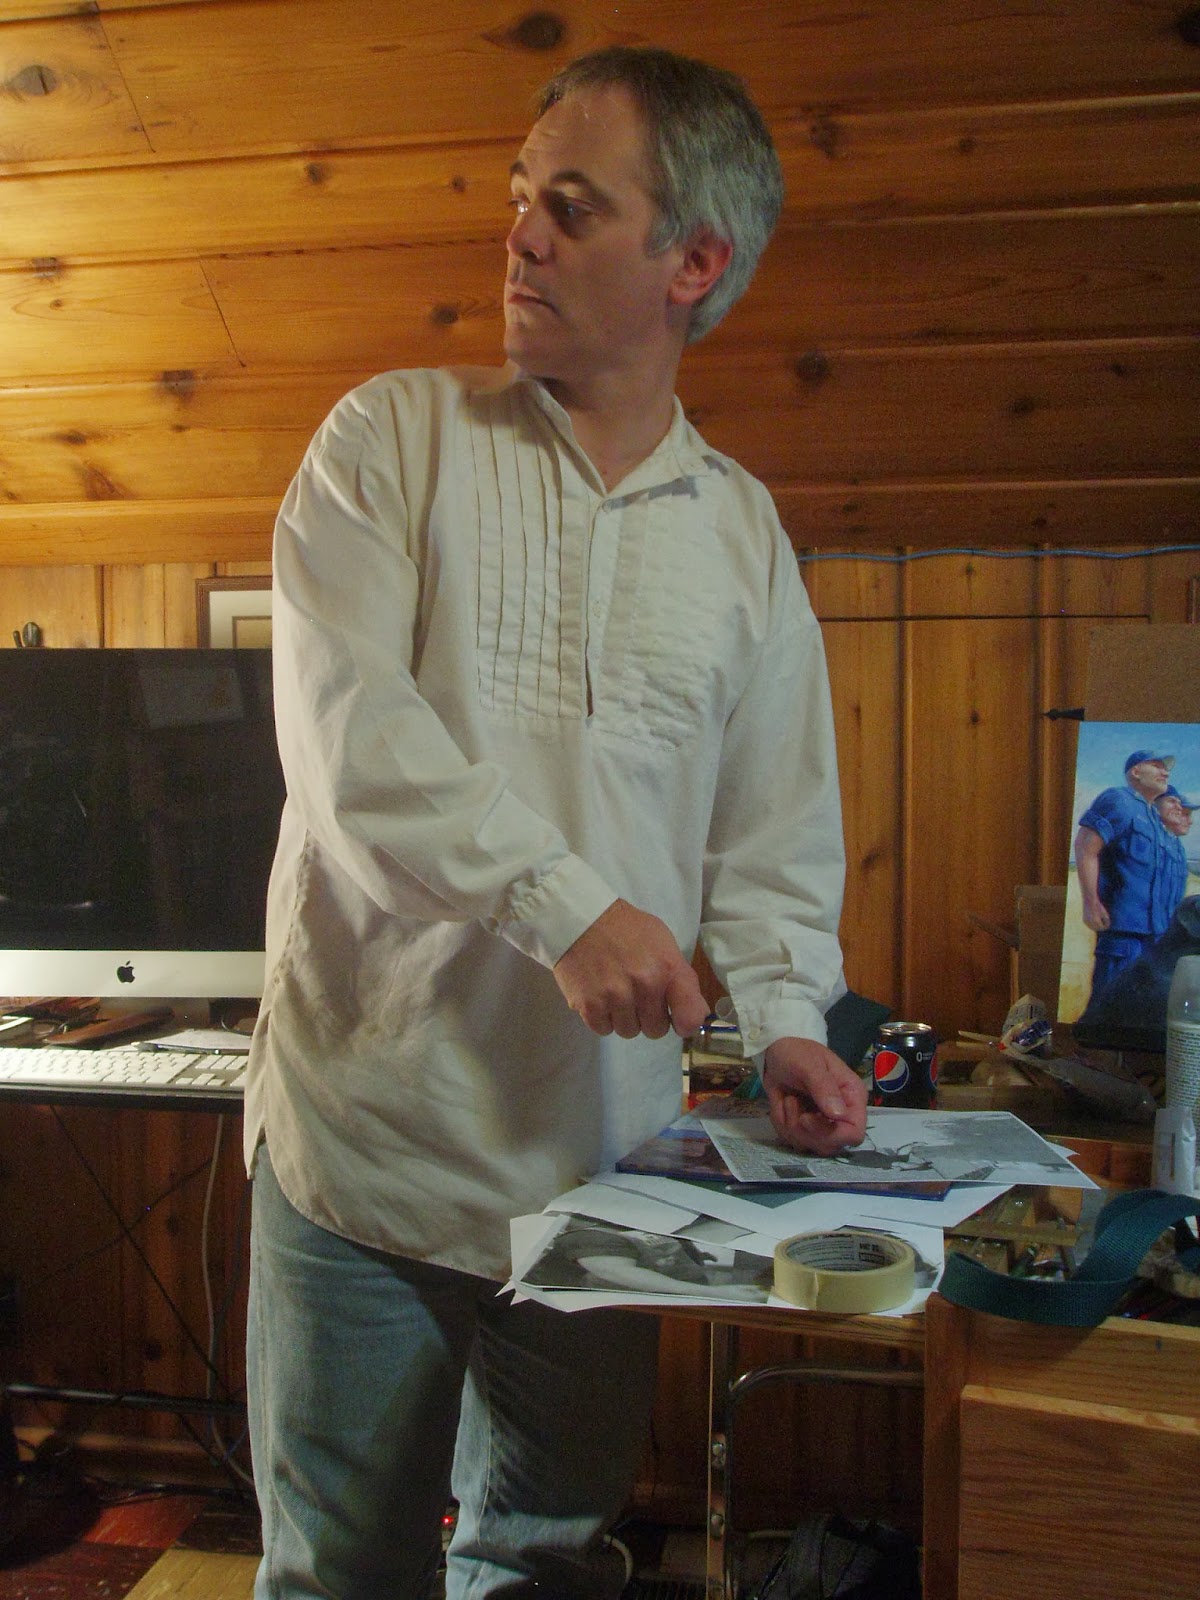
Friday, April 11, 2014

"The Charge" is finished.

"The Charge"is ready to hang on your wall!

After a journey that started more than a year ago, (you can read the gory details in my June, July and September 2013 posts) my interpretation of the charge of the First Minnesota Regiment at Gettysburg is painted, scanned, printed, signed and numbered . . . and waiting for you to buy it and hang it someplace prominently in your home or office.

Just before the signing and numbering began . . .

It was printed by Husom and Rose of Hager City, Wisconsin, a fine shop run by two artists who know their stuff.

 For years, other people had hired me to paint, reproduced my work and printed vast numbers - none of which ever sold out, or even came close, as far as I know.  This time, the entire project was mine, and I determined to "do it up right" by making a limited - edition just that.  Limited. It is limited to 47 regular prints, 4 artist's proofs (these last 4 have small, hand-drawn remarque sketches) and 2 special reserve prints.
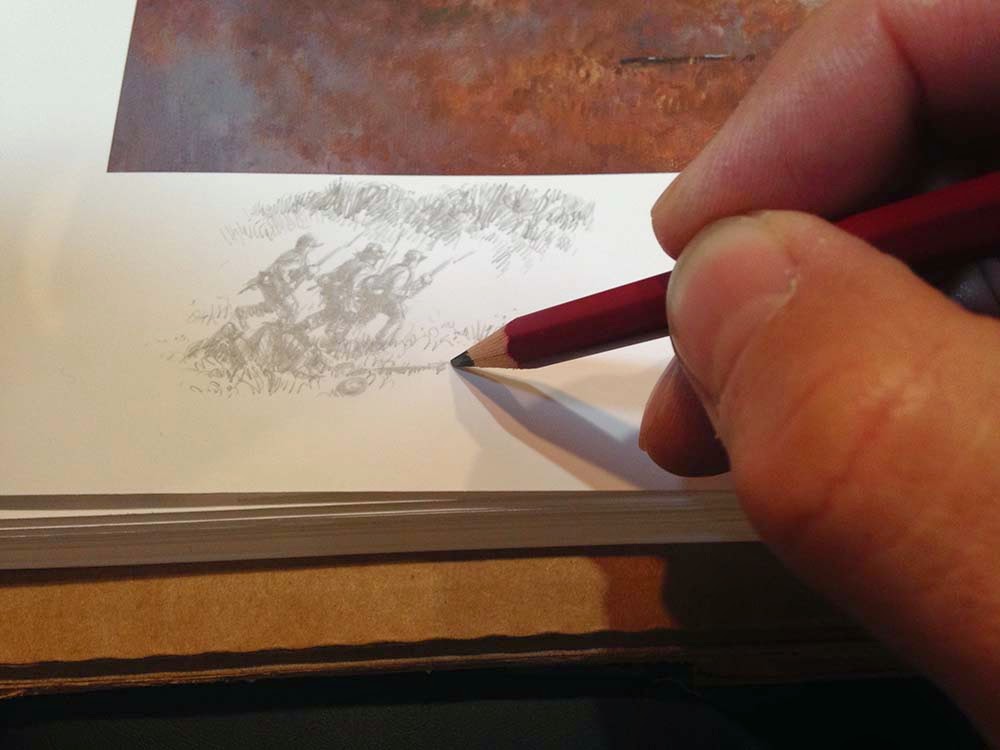
I have added remarque sketches to the Artist's Proofs and the 2 special reserve prints.

The number 47 has special significance to historians of the First Minnesota.  As the battered remnants of the regiment gathered around the shredded remains of their flag right after the charge, there were only 47 men standing.  Although others rejoined the regiment that evening, that initial roll call no doubt stunned the survivors.

I am happy to say that as I type this we have already sold all the Artist's Proofs and 12 of the regular print, and I am thrilled that folks like this work.

The painting ( and yours truly) is shown briefly in these videos made by the Minnesota Historical Society and Antietam Creek Press -

 David Geister: Civil War Artist Minnesota Remembers: Battle of Gettysburg, 1863 and "The Charge" painting unveiling at Gettysburg.

If you are interested in a copy of "The Charge", please go to my website "store" (click here) for details and send me a message.  I will be most happy to accept your hard-earned money and in return I will send you this labor of love.

Tuesday, January 7, 2014

The Goblin in my Basement - Part 1

There really IS a goblin in my basement!


It’s true. I have a little goblin in my basement. Don’t believe me?  Let me show you indisputable photographic evidence . . .


Charming lad, eh?


This mischievous chap is not particularly large (maybe 8 inches tall on a good day) and, to be fair, he’s not particularly mischievous, either.  I am inclined to believe that he is a sympathetic little creature, and that he may have once been a member of a royal family . . . the fact that I cannot understand a word he utters suggests he doesn’t speak English, and therefore is not a member of THAT royal family.

I really ought to know more about this green-skinned humanoid.  I am, after all, his creator, and he is the “star” of a short, animated movie I have been making in my basement for the last two years.


Yours truly and his houseguest.


Let me start at the beginning.

As a child, I saw the 1933 movie “King Kong” and immediately wanted to know how it was made.  I gradually became aware of more movies that had fantastic creatures that couldn't possibly exist.  They didn't seem real, exactly; there was a toy-like quality to them, as they lumbered through forests or stomped down the streets of ruined cities, that I found mesmerizing. If you read my August, 2013 post about "Little Wars" you will see that same fascination with miniature worlds.  In the end, the dinosaurs (and COWBOYS!) from “The Valley of Gwangi” and the poor Ymir beast in “20 Million Miles to Earth” grabbed me by the throat and wouldn’t let go. 


Magnificent.


As a 6 year old kid, I knew these guys didn't live at the same time, but it didn't matter.


The poster says it all!


Thanks to a kids book on monster movie magic (NOT the real title) found in the Prescott Public Library, I learned that these creatures were brought to life by the use of something called “stop-motion animation”.  Articulated puppets were placed in a miniature set and photographed, one frame at a time, as they were ever-so-slightly moved from one pose to the next.  Played back at a rate of 24 frames per second, they seemed to be alive. I learned the names of pioneering animators Willis O'Brien and Ray Harryhausen and to this day their work is every bit as important to me as Rembrandt or Rubens.


I used to drool looking at these pages . . .


We were too poor to afford the super 8mm movie cameras that Sears advertised  with “single-frame” options, so I never got a chance to try this out. I did, however, spend the next 40+ years learning how to sculpt and paint miniature buildings and figures, and for a number of reasons, it was time well spent.

So endeth my ancient history lesson.


Still frame from "The Wargame"


In October of 2011,  I discovered that I could make an animated movie in my basement using a simple point and shoot camera, my military miniatures and free image-sequencing software on my Mac. I stayed up several nights, carefully moving little tanks and shooting photos, until the sun came up. It was a blast (pun intended) and I was hooked.  Here’s the link to that first endeavor:


2 lavishly illustrated books about the work of my animation hero Ray Harryhausen suddenly appeared on the shelves at Half Price Books and my childhood dreams of fantastic beings in fantastic worlds seemed to spring to life once more. My imagination ran wild at the possibilities.  Dinosaurs?  Monsters? Fairy Tales?  Whatever should I do next?


Stay tuned – more “Goblin” coming soon!


Friday, November 15, 2013

Art Show Frenzy - part 2

I survived!!


This will be a short post - I am sick, and I have noticed a tendency to ramble when I sit down to write this blog, so brevity is the watchword. At least for tonight.

 My own little corner of the show, surrounded by new work.


In the end, I only managed to complete 13 of the paintings that I started for the show, but that's o.k.  I am just so glad that I had enough pieces to fill my display wall and that there was a bit of variety to that. A handful sold, the rest will be sold as the year ends and 2014 rolls on in.

As I think about the process of painting these (which now seems like a month ago instead of last week) I am struck by how truly exhilarating it all was. I enjoyed bouncing back and forth between the fine detail in some of the birds and the looser, impressionistic brushwork of some of the backgrounds and landscapes.

I began to glimpse a possible new style, more dynamic and atmospheric, for my commercial work. Can I do it? We shall see. I am a creature of habit.

Here are a few of the finished pieces, prior to framing on the day before the show.

"The Crafty Fellow"  SOLD


"Cardinal"
(A clever title, eh?)


"Chickadee"
(An even more clever title . . .)


"On the Cascade"  SOLD


"Winding Down"  SOLD


"Superior Overlook"


Thanks for swinging by - I appreciate any feedback you care to offer.  In a few weeks I will begin animating my little Goblin movie, for the first time in a year, so expect some posts about that.

Cheers!


Saturday, November 2, 2013

Art Show Frenzy - part 1


“I think I can, I think I can . . .” 


At least 15 brand new oil paintings need to be framed and hanging on my modular wall in the Taylors  Falls Depot Artisan Show six days from now.  No problem! I have done this show before; I must be almost ready . . . right?

Wrong.  Oh, so wrong.  Due to a variety of issues, I have only been able to devote a fraction of the time I normally would to this show. 


This was taken a few days ago - do you notice the absence of finished paintings?


Not to worry.  I will be ready.  I have a system, of sorts.  

For the last few months I have been photographing anything that could serve as inspiration for a painting. I have been printing out selected aspects of these photos, scaling them to the dimensions of my ready-made Gessobord panels. I have been paying extra special attention to color and light effects out of doors lately – filing away mental images that I find intriguing.


As soon as we stood on this spot, overlooking Lake Superior,  I was inspired to do a painting of it.


Two boxes of frames just arrived from an online framing company, and have joined the ready-made frames I picked up from a local craft store.  My taboret (combination wheeled cabinet and palette) is loaded with tubes of paint and several new brushes.

My approach in cases like this is to plop the primed panels into the frames, tape whatever image I intend to paint right onto the panel and then move onto the next one, trying to get a sense of just what the show might look like.  I play musical frames, selecting the style and color that I hope will work best with the finished painting. Having a series of works in progress displayed on easels all around me takes some of the panic away.


 My patented "panic mode" approach to starting a painting. Note the printed photo as well as the frame still in its packaging.  No time to waste.


Ojibwe lodge created for a recent rendezvous at the Northwest Company Fur Post near Pine City, MN.


My initial sketch in burnt umber using the previous photo for inspiration.

To make sure I use my limited time and energy wisely, I start tackling the more complicated pieces first, sketching in pencil and paint, then blocking in big masses as quickly as possible. The smaller pieces, mostly bird pictures and little landscapes, will be the last ones I worry about. 


 At least these two are nearly finished. It's a start, eh?


If this seems a bit mercenary, it should. I am painting these to sell, and for both my sake and the sake of my clients, these need to be economical pieces.  Having said that, I should point something out.  This is actually one of the few times during the year when I can paint whatever I want – and this freedom is so exhilarating!  I reconnect with my love of painting, even while standing in the middle of a mad house for a few weeks.

My next post will show the finished pieces.

Cheers!

Saturday, October 12, 2013

Creating Dred Scott - part 3


Time to get dirty!


The back of the Harriet Scott photo/sketch, covered in charcoal, after tracing.

The modified drawings were coated on the back with charcoal, taped down to Gessobords (not my spelling, I swear - these are commercially available, prepared masonite panels) and I traced the most important lines and features. These crude and easily smudged drawings were cleaned up, details were modified and each panel was given a protective layer of spay fixative followed by brushed-on acrylic matte medium to keep the drawing from lifting while during underpainting and add just a slight brushstroke texture.

Ah, where would we be without all this messy stuff?!

I decided to introduce even more texture into the piece using acrylic gel medium.  This would give an actual  3-dimensional quality to certain areas of the painting – in fact, I would come to regret my rather sloppy application of the gel this time around.

Within an hour, I was painting.

I began by staining each scene with warm tones, a light ochre for the outside scene and darker burnt umber for the interior scene. This is a way of setting the painting up for a specific color scheme, and quite frankly, I don't like staring at all that unpainted white background when I work.   In neither case did I allow the stain to obscure my charcoal lines.  I don't really have photographic evidence of this stage - I was too BUSY trying to meet a deadline! You will just have to take my word for it.

You can pick up a hint of the ochre stain underneath some areas here. Things are pretty loose at first.


For Harriet’s picture I restricted my palette to muted yellows, stronger reds and deep browns – there is just a touch of blue/green, weakened by mixing with red-brown. For Dred, I used the exact same palette with more blue worked into the shadows areas to create a feeling of strong outdoor daylight.

As I painted I made continued reference to the existing images of the Scots, as well as my modified photo/drawings, as a way to ensure not only the features were correct, but the folds and wrinkles in the clothing and the effect of light were accurately captured. I never follow these references exactly, but they do give me answers to some questions. Like my brush and palette knife. they are simply tools to be used as needed

This is a typical set-up. Well, it may be a bit more organized than usual, but you get the idea.


I moved the flagpole to the top of the round tower, where it likely was in the late 1830's.  Hey, it's history, you know?


The texture that I introduced at the beginning worked well in some areas, like the shoulder of Harriet’s dress, especially when compared with the softly painted broom in the background. Light bounces of those little ridges, giving a physicality to the surface and this contrast makes the shoulder stand out appropriately. 

Contrasting light and dark, soft and hard edges and a bit of texture for good measure.


However, thanks to my haste, some texture was allowed to creep into shadow areas, and even into Harriet’s face, and that, folks, is what we call a “Bad Idea”.  When unwanted texture obscures details or breaks up what should be a smooth plane, it is a distraction (especially in shadow areas) and can confuse the viewer as to your intent. While we accept and often look for texture in an original painting, in a print or book illustration it can be a problem.  I continually use Photoshop to "paint out" annoying texture when a piece has been scanned for reproduction.


It got a little too bumpy here and there.

In this case, I don’t feel that the texture is really a problem.  I just need to be a bit more careful next time around.  Bloody amateur.


Perhaps the most enjoyable part was the firelight and detailing of the table, kettle and vegetables.  No real pressure, just a chance to play with light.

I think these paintings took about two weeks to complete.  In each case, the painting is a gradual build-up over at least 3 or 4 sessions (with an occasional touch up even later), each layer modifying the previous one. My brushes tend to get smaller with each session, as I focus more on details.  At the same time, I am constantly looking for areas that may need softening and blending into the background.  I need to remind myself just what is really important, and what can be allowed to drop out of focus. This can be the trickiest part of all, after capturing the likeness.


The Harriet Scott painting on the easel.


Harriet Scott


The Dred Scott painting on the easel.


Dred Scott

And there we have it, folks. Whew.  I hope I have done justice to history and to the spirit of these two human beings who ended up playing such important roles in our nation's past. When I have decent scans and a link to the finished documentary that these were originally created for, I will make a final post.

Cheers - and thanks for letting me share this process with you.


Monday, October 7, 2013

Creating Dred Scott - part 2


Putting it all together.


After approval was given to forge ahead with the paintings, I had an important decision to make.  Who would pose as Dred and Harriet Scott? If I had needed to create recurring African – American characters for a picture book, I would have selected appropriate African - American models, as I did in the past with Gwenyth Swain's Riding to Washington. The situation this time was different. I would be replacing my model’s faces with the faces of Dred and Harriet.  

Therefore, I opted to go the “easy” route, and could get away with using a pair of Anglo-Saxons – my wife and myself.  We are simply the cheapest and most accessible models I have ever used.

As Harriet Scott, my dear wife dressed in an 1830’s pattern dress she had hand-stitched a few years ago. Without this valuable piece of costuming, I would have had to modify the photos of Pat wearing a dress from a different time period, which is pretty common for me.  I rarely have all the costumes and props exactly as I need them, and end up becoming a type of tailor armed with pencil and eraser, with a stack of costume books and internet images underfoot.

 Pat as Harriet - she's chopping vegetables on a box of miniature soldiers.


I showed Pat my preliminary sketch and then we posed her standing in my cluttered studio, with light coming from two directions to simulate both window and firelight.  Thank goodness for cheap clamp-on lights from our local hardware store. Pat even sliced some small, red 19th century appropriate potatoes for me while she stood there, which we later ate prepared with green beans and her home-made pesto. Yum.


Normally I would set up the camera on a tripod with a 10 second delay on the timer, and pose for myself, but this I wanted to do it right.  I made a phone call to our dear friend and neighbor, Rebecca (artist/photographer/thrower of awesome Halloween parties), and she shot photos of me posing in the raking, morning sunlight. The folks driving past my home in South Minneapolis are becoming used to the sight of me, Pat and a host of neighbors and friends in costume, play-acting for the camera in the yard or on the sidewalk. We have never been visited by the police after one of these affairs – even when posing with guns – so I count myself lucky. 

Me as a well-fed and freshly laundered Dred Scott.

For my role as Dred Scott, I was able to get away with wearing my early 19th century clothing and  doing a few pencilled alterations. I also found it necessary to erase a few pounds from around my belly and jawline; Dred Scott would not have had access to the array of snacks that are my great weakness.

Photoshop is my friend.

The axe head and chopping block came from a photo taken at the fort.


In Photoshop I combined the pose photos with the background photos or sketches and printed out both pieces at full size on my printer. These prints will become my comprehensive sketch and also my tracing sketch.

Finally, using the only images I have found of the Scotts, I broke out my pencils, sharpies, and white paint and began to carefully draw right on top of the printed references, Dred’s face on top of mine and Harriet’s face on Pat's.  This involved shifting the position of eye sockets, noses, etc., and worked surprisingly well.  At this point I also drew some of the details of the Scott’s environments, but left much to the painting phase.

Much better!

It's quick and not very pretty, but sketches like this make my life a LOT easier.


In a few days I will post Part 3, where I talk about transferring the sketches and painting the final pieces.  Cheers!

Friday, October 4, 2013

Creating Dred Scott - part 1


"You need it WHEN?"


I was recently asked by the Minnesota Historical Society to paint pictures of Dred and Harriet Scott, slaves who met, married and lived at Fort Snelling in the 1830’s while their owners were posted there. The Society is creating a series of short documentaries relating to Civil War topics and the Dred Scott Decision of 1857 is one of the powder keg issues leading up to that war.  They were editing together a 6 minute piece on this subject, and needed a pair of images to add "life" to the main characters. 

Period engraving of Dred and Harriet Scott.

The producer wanted to show both Dred and Harriet at work within or close to the walls of the fort, a place near and dear to my heart. My dear wife and I met, married and worked there for more than a decade.  As far as I know, Dred or Harriet Scott have never been painted, and the chance to be “the first” was more than I could pass up.

As usual, there was very little time to pull this off – there never is. I immediately accepted the challenge, despite the fact that I was still finishing a series of picture book illustrations.

I visited my good friends, the historians at Historic Fort Snelling, and we talked for a while about just what the Scotts would have done there on a daily basis, as well as how they may have dressed and what their quarters may have looked like. My camera came in handy, but I realized I would have to modify the recreated quarters to accurately reflect their likely 1830’s appearance. 

 Interior of the recreated quarters at Fort Snelling.


My dear friend Tom "poses" for me in front of the Scott's quarters. The other pop is mine. Really.


 The correct shape for an early to mid 19th century axe head.  This is important.


The following day, I shot photos of myself as both Dred and Harriet, and then drew two compositional sketches based on these.  Time was slipping away and I simply needed warm bodies to quickly establish the most basic information upon which to build a scene.  Details would follow later.

Me, as Dred Scott, holding my nice axe.
You can see the picture book I was trying to finish, taking over my main easel.

Me as Harriet Scott. I didn't even need a dress for this one.  Just some puffy sleeves and a warm body.


Dred Scott sketch.  See how it all comes together, minus Tom and the bench?


Harriet Scott sketch.  In the end, we changed the walls and hearth and lost the printed pattern on the dress - thank goodness, because those patterns add TIME to a painting..


I didn't hear anything back for a crucial week, and was prepared to take on my next project when I received word that the project was a go.  Thankfully these sketches were approved, and the REAL work could begin.

In Part 2, I will continue this process, so check back soon.